Tuesday, October 26, 2010

Canning Hamburger

We purchase all our household meat when it is on super sale at the grocery store. A few years ago I tracked when various items went on sale throughout the year. Both chicken and beef are at sale prices the same three times a year. Beef just happened recently so on sale and we spent 50 dollars to stock up on quite a few months worth. This year, we went early enough to be able to purchase round steak as well. The hedonistic luxury of steak is going to be quite gluttonous in the months to come.

By portioning the meat, our round steak worked out to cost 74 cents a meal. I encourage people to not coupon clip, but to watch when certain items are marked down incredibly low and then stock up.

By canning the hamburger we purchased, there is no need for freezing and we can have it for years to come. The pre-cooked status of the meat makes it ideal for dehydration (for backpacking) as well as summer dishes where all that is needed for the oven is to reheat quickly.

Canning Hamburger
Though raw packing can be done, it honestly makes me nervous. So we precook our meat slightly. Basically you want their to still be enough pink to cause you a pause about eating it. The meat should be cooked enough that if you were really, really hungry you would consider eating it. The pressure canning completes the cooking process. If the meat goes into the canner completely cooked, what comes out is really tough and often cooked down into really small little bits.

There is just no way to make partially cooked meat pretty.

When you cook the meat, put it into an ungreased skillet and then fill the skillet with water enough to cover. This will boil the fat out of the meat as well as give you liquid to pour into the jars.

Use a slotted spoon to drain as much liquid away from the meat as possible and then stuff it into the jars. Since hamburger cooks up in irregular shapes which are slightly "fluffy," it is important that you really stuff and manhandle the meat in the jar so that it really packs down.


Using a 1/3 of a cup measure, pour enough liquid into the jars to cover most all of the meat, but still leave 1 inch of head space.

Due to meat being greasy, the rim of the jar will need to be wiped down with white vinegar before the lids and rings are placed on. If any grease or meat residue is left on the ring, the jar will not adequately seal. We can meat which is 20 percent fat or less. By boiling (instead of frying) the meat, most of the fat is removed. When the meat cools and the jars have been at room temperature for a couple months, the fat will layer at the top further helping to seal in the meat.

Process at 12 lbs of pressure for 75 minutes (pints) or 90 minutes (quarts).

Sunday, October 24, 2010

Homemade Dishwasher Detergent

Dishwasher detergent was one of the most expensive things we purchased each month. What is more, I didn't like our dishwasher all that much due to its ghetto ancient status and cleaning ability. All this lead to washing our dishes by hand. Our dishwasher became a holding tank for the dishes until I could wash them, and was used sparingly. We still run it every 10 days or so, or when Jules is home by himself.

When I looked into homemade dishwasher soap I always had the same problems: 1) everyone complained they didn't work and left a filmy white residue, and 2) they contained Borax. I am personally a bit in love with Borax and use it to clean everything in our bathroom, as well as our Laundry Soap. The problem is Borax is extremely toxic.

While we are not sucking on our clothes after they have been rinsed and hopefully no one is licking any fixtures in the bathroom, we are putting our dishes in our mouths. If any residue does remain, I don't want to ingest it.

After some trial and error, we now have a dishwasher detergent which doesn't leave film and doesn't contain Borax. YAY!

Homemade Dishwasher Detergent
1 cup Castile soap (We use Kirk's)
1 cup citric acid
4 cups baking soda
2 cups washing soda

Grate the soap up on ultra fine and then pulverize it into a powder as best you can. Be sure you use a form of Castile which will dissolve well in cold water. We tried our Kirk's out in the sink before using it in the dishwasher just to be safe.

Once the soap is in as much a powdered state as possible, put it in a big bowl and mix in all the other stuff. I finally had to resort to mixing in my giant bread bowl so that I could be sure all the white powders were mixed evenly.

Fill up the soap container of your dishwasher with the detergent and then fill the rinse agent with white vinegar. The vinegar reacts with the baking soda during the rinse to clean any residue. The citric acid does the same thing as well as cutting through most gunk. Be sure you get granulated citric acid rather than lemon juice or another product which contains the citric acid. It only works when it has initial contact with water.

I have read in multiple places not to wash patterned dishware with citric acid. Since my vintage Pyrex is the only patterned dishware we have in the house and I love it beyond measure, I haven't tried it. I don't know if the warnings are valid, but just be sure. Metal seems to be fine, though I have seen warnings about that as well.


So clean you can see straight through to the dirty back porch!


Important Info: If you want to make this dishwasher detergent, go out to the store quickly to purchase the citric acid. Now is the end of the canning season and general grocery stores will not only have the product on the shelves, but also have it for really cheap. At other times of year it is harder to find, though it can always be ordered through the internet.


Monday, October 18, 2010

Roller Skating

So, what do we do without television? We go roller skating!

The local community center has an old fashioned roller rink and homeschool skate once a week. Kids of all ages (and nostalgic adults) come out for only 1 dollar and skate the afternoon away. Though last year was more about playing and much less about actually skating, this year the gross motor skills have kicked in enough to balance on skates quite well. It is a TON of fun!

Tuesday, October 12, 2010

Bountiful Harvest and Apple Rings

My uncle is a farmer. He was raised a farmer and has continued to be such his entire life. After duel knee replacements, a few bouts with strange diseases, and more than a couple decades of years under his belt, he is no longer able to climb the ladders and pull in all the vegetables which he once used to do. This hasn't stopped him from farming however. Now, my father and I help pick up the harvesting slack. From blackberries, to 3 types of pears, 2 types of apples, huge sweet onions, carrots, and giant pumpkins big enough for The Barracuda to fit inside (literally), he is constantly providing us with harvests.


The petunias he grew from seed and are now larger than Jules. Most of his dahlias are larger than my head.

The issue soon becomes, what on earth do we do with all this produce? Over the summers Jules is around to help out with all the canning. We can go through a serious amount of harvest between the two of us along with the helpful hands of The Barracuda here and there. However, school is in full swing and Jules is undergoing National Board Certification this year. His hands are very busy.

I'm not complaining. Free food is free food and this is organic, farm grown, good food which cans up fabulously. But it has gotten me thinking about our own orchard and garden in a couple years when we have ample land. Planting a multi-season harvest sounds like an incredibly brilliant idea. Why not have apples that ripen two months apart so you get two different batches and multiple months worth of fresh fruit? Pears which are early fall ripeners and then more which are late ripeners provide more fruit and many chances for enjoyment. Oh this just sounds so ingenious.

However, it also means much more time spent processing pears, while I'm also trying to process tomatoes, and apples, and jam and finish quilts before the cold, homeschool an energetic kid, keep Jules' favorite work clothes clean, and knit up another years worth of kitchen clothes. Inevitably the fruit flies will start and the canning will never be done in time.

Half of the harvest last time

This isn't to say we don't grow things over the fall and winter. We are lucky enough to live in a place which is mild enough for much to grow all year long. However, these are not canned items. Spinach, garlic, collards, beets, and cabbage do not need to be canned up and can be eatten on demand. The Beatles and the Bible got it right: "To everything there is a season, and a time to every purpose under the heaven....a time to plant, and a time to pluck up that which is planted...." I am not a multi-season gardener when it comes to canning. Let's be real, Self...it aint gonna happen.

Luckily, I have now learned this about myself and can safely say that when our orchard is planted it will possibly be of multiple varieties, but they will all be one season. One crazy, action packed, very sticky canning season is about all I can muster.

What we have done with a lot of the harvest is make apple rings and pectin. Lots and lots and lots of apple rings. We are going on 5 quarts of apple rings and I'm already beginning to have to ration as I notice significant dwindling.

Apple rings are taken when we backpack and are chosen over cookies by The Barracuda when we are home. Jules is also quite good at nibbling over half a jar in one sitting if I let him. I thought I would be sneaky and purchase some from the store, but they both hated them. So, its back to the dehydrator for me.

To make apple rings you must first peel the apples. A crank style peeler is worth every cent of the 20 dollars they cost. They work for pears, potatoes, and just about any other firm fruit with thin skin. You can also buy slicing attachments of different sizes to produce different thicknesses. This will core, slice, and generally make the entire apple ready to be processed. Not only do they make the task fast, but they make it fun for little hands that cannot wield a knife or peeler well enough to not get hurt after four or five apples. The Barracuda peels most all our fruit at this point because he finds the crank so much fun.

Lay the rings out on trays and dehydrate for at least 4 hours at 135 degrees. We like ours thin and rather crisp so 6 hours is about right. Use some trial and error to find the correct time for your family. But, be sure you place them high on the shelves or you will soon run out!

Monday, October 11, 2010

Making Pectin from Apples

Jam is something we haven't spent much time creating in our household. I'm not too fond of the idea of adding mysterious white powders to our food. I realize pectin has been used for a long, long time, but it still creeps me out. Whenever I would look it up, I would just get some generic explanation about it gelling things and being a natural bi-product of fruit. There was rarely any info on how exactly they went from the fruit to the white granules.

Well, I am now here to tell you that you needn't use the weird white granules. All you need are some apples! I still don't know how they go from fruit to powder, but I do know how you can make your own pectin all by yourselves. This has now landed our house with a nice helping of blackberry jam and very excited boys.

Pectin is a product of fruit and 100 percent natural (at least when you make it yourself). All fruits contain pectin in some degree or another and common fruits which are made into preserves often have larger quantities. The level of pectin of each particular fruit also varies from year to year depending on weather and other mysterious factors. It is generally agreed upon, however, that apples have the highest quantities and that the pectin is normally not in the highest quantities in the actual meat of the fruit. Pectin contents are often higher in the skins, seeds, cores and such. (I still don't know how they even know that!) It is also higher in fruit which is slightly under-ripe since apparently some of the pectin is lost when the sugars are converted in the ripe fruit.

To make your own pectin you basically make apple stock. Just like someone would make chicken stock, but only with apples. In our household, we make it from all the bits which won't work to make apple rings or applesauce. All the peels, cores, deformed apples, slightly murshy ones, and other odds and ends which don't dehydrate well become pectin. Making pectin also makes your house smell really, really good.

Take your undesirable apples and cut them into quarters - stem, peel, cores, and all. Generally somewhere around 7 small apples is good. More is always better. Throw them into a large stock pot with all the other inedible apple parts. Fill with enough water to cover and simmer all day. I really mean all day. Keep adding water as needed to keep them from burning, but you are going for a look like runny applesauce. It can be helpful to smash up the softer parts with the spoon as you stew them all.

When you have runny applesauce stuff, you now need to strain out all the inedible bits. All you really want is the liquid. Line a strainer with an old T-shirt and dump in apple glop in parts into the shirt. Lift all the corners of the shirt up and squeeze the liquid out into a bowl. The apple goo can be composted (the T-shirt we just throw away because I can never get it clean again). Once it is all strained, return the liquid to the stock pot. Turn the heat up to high and boil the snot out of it. Be sure to stir constantly. The liquid will get really, really thick and can easily burn. This is your pectin. When the pectin is the consistency of syrup, it is done. Add about 1 cup of pectin for every quart of berries to achieve jam the consistency of store bought. Always do a gel test to make sure your jam will "jam" and add more as necessary.

As an added benefit, once the liquid is strained (but not boiled) it can be frozen for later use. You only need to boil the liquid down for about 7 to 10 minutes, so freezing gives you quick pectin.

Thursday, October 07, 2010

Homeschooling Subtraction

If you child isn't understanding the standard definition of subtraction (going backwards or taking away), don't fret. There is nothing wrong with you as teacher, and there is nothing wrong with your child as a learner. Most likely, they just think about numbers differently. This is a good thing. All great mathematicians have thought about numbers differently - that is why they were great.

How your child thinks is sometimes very apparent. In other kids it takes some trial and error. Don't give up and don't try to force something that isn't working. It is just as important to look at what works as what doesn't. Does your child like sports, wiggling constantly, dancing, or movement; explain with manipulatives you have to move around or have them step backward and forward as if they are personally moving in space. Is your child good at English, words, definitions, vocabulary, stories; explain it by relating it to words and the nuance of meaning. Is your child good with pictures, drawing, artistic expression, and the relationship of concepts through art; explain it visually with manipulatives which show the concept. Is your child a big picture thinker, needs to know how it all works, likes to tinker, wants to see how thing relate to one another on a larger scale; explain it by relating the numbers to one another in the space on a number line.

Explaining things for my son's different learning styles was definitely a growth space for me as a parent. It has done wonders for my understanding of the subject and also really helped me develop many areas of my brain which I never used.

Explanations of Subtraction
Standard definition: Subtraction is counting down or going backward on the numberline. You subtract three, you go backwards 3, you count down 3. This is the one most people always think of about subtraction; it is when you lose something or give it away. 8-3 =5 looks like this:
English definition: Subtraction is like saying "or." You are separating a group into its pieces. Instead of wanting this and that (addition), you want this or that. You are separating the group up and isolating part of it. You start with an amount, then separate part away, keeping one part for yourself. You want either one part or the other. In a story problem you should use subtraction if they only want to know about part of the group. 8-3 = 5
Movement definition: This is done the same as with the English, just have them physically separate three items from the group. Some kids need to actually move the three manipulatives. 8-3 = 5


Big Picture Thinkers definition: Subtraction is the difference in between two numbers. It is describing how many things are in between. Eight minus three is the same thing as saying how many numbers are there if you start at eight and go till three. In a story problem, you use subtraction when people want to know how much more or less of something - when they want to know the space in between two items. 8-3 = 5

Visual definition: Subtraction is a way of doing reciprocal algebra (doesn't that sound fancy! Most every adult I know does this regularly; it isn't as fancy as it sounds). 8 minus 3 is the same as saying "what do you have to add to three to get eight?" Later on, everyone does this in algebra with 3+x=8

If you think about subtraction in terms of adding you are basically saying: You had two groups of numbers and added them together (this would be the top number in a subtraction problem), now you are taking one of them away (the bottom number), how many are left (the answer)? In example, eight minus three is like saying, "You added three and five to make eight. Now you are taking the three away, how many are left?"

Since subtraction is splitting a group up into parts, another way to say it is: if eight is the answer and one of the pieces is three, what is the other piece? If a child has a strong foundation of addition, this causes a very logical jump to how subtraction is the opposite (reciprocal) of addition. It also helps later when working with algebra because the concept is basically 3+x=8.

Manipulatives really helped when trying to explain to the Barracuda what I was talking about when we used the algebra method. I took two manipulatives, declared one 3 and one 5. I pointed to one, he said,"Three." I pointed to the other one, he said, "Five." We did this like four times. By putting the manipulatives together, he could see they made 8. We did this like four times. He would say, "eight." He thought I was crazy, we had covered this already and it had nothing to do with subtraction as far as he was concerned.

Next, we started with both manipulatives together. How many? "8," came from him. I pointed to one and asked him how many. "3," he would say. I pointed to the next one, "5," he would declare. I then took the 3 manipulative away. The answer was plainly 5. We had to do this demonstration a good six or so times with different numbers on different days. The concept seemed so simple to me, but requires quite a bit of knowledge chaining. It is a jump in concepts and you have to link them together, but it helps quite a bit later on.

I told him each time we did the demonstration that it was okay if he didn't understand. For the first three times it was obvious he had no clue what I was trying to say. By fourth and fifth time, the glimmer was there, he knew the answer but how he got it. He couldn't apply it at all. The sixth time, you could tell it all made sense in one big "A ha!" moment. He was obnoxiously proud of himself! Now he talks himself through subtraction problems by saying, "How many do I have to add to 3 to get to 8?"


Hopefully this is helpful to all those frustrated parents out there. Far too many times, kids learn to bluff their way through in school because they don't want to say they don't understand or they become frustrated with themselves. Unfortunately, by the time I would get most of these children in high school they had already made up their minds that they "just weren't good at math." I have yet to meet even one with which that was the case.

Tuesday, October 05, 2010

Canning Pumpkins

Pumpkin are pretty darn great and highly underrated. I'm very pleased to have a family which regards them quite fondly when placed into pie, muffins and the occasional soup.

Shortly after he turned 4, The Barracuda and I were invited to a pumpkin carving party. We don't really carve them in our household, but I figured The Barracuda might like it. Just because Jules and I aren't into holidays doesn't mean he can't be.

He looked at me in completely confusion as we got out of the car in front of the party house. "Why are we doing this?" he asked.

"Because it is fun," I lied, "and they said there would be pizza."

His face became aghast. "Mom! Pumpkins are for eating, not fun!" This was quickly followed by, "Can I still have some pizza?"

Pizza can save everything.

And so it was settled. In our family, we eat pumpkins; we don't carve them. Now we grow Amish Pie pumpkins. We get very excited at counting just how many are growing rather than carving.

I must admit however, pumpkins are the drunken college roommate of the garden party. They are obnoxious, never stay where they are put, and tend to cling on to every other guest they come into contact with regardless of whether they are wanted. But you just have to love them even when you swear you won't ever invite them back. You always replant pumpkins.

Though pumpkins will keep just about the entire year in our root cellar, we don't eat them. It is as if the idea of cooking an entire pumpkin, removing the skin and then using the meat is just too time consuming or something. We now can our pumpkins so they are just a popped-top away from eating. It works much better.

To can pumpkins, the meat must first be cooked and removed. Cut the pumpkin in half and scoop out all the seeds. We don't roast the seeds, but we always set some aside to save for next year. In order for the seed to come true, heirlooms (or open pollinated plants) must be planted from different geneses. Here's a great list.


Preheat the oven to 350 degrees. Adjust the racks so there is only one middle rack. Put the seeded pumpkin halves face down on an ungreased cookie sheet and put them into the oven. Only bake one set at a time or they cook unevenly and get burned.


Bake them until their skins begin to get loose and slightly bubble up. Poke them with an oven-mitted finger and you should be able to feel the loose skin. Generally, when you begin to smell them cooking, they are done.

Let the pumpkins cool before you decide to remove their skin. Not only are they really hot and ooze scalding pumpkin juice onto your fingers, but they are also all murshy when they are hot and don't peel well. Once cooled, the skin should peel back easily.


Break the pumpkin meat into pieces about 1 to 2 inches in size and drop them into the jar. You cannot puree pumpkin for canning because the viscosity cannot be controlled. Apparently, the USDA has decided this can kill you. Fill the jar with water leaving 2 inches to the top. Process at 11 pounds of pressure for 65 minutes (pints) and 75 minutes (quarts). By the time it cooks down, it is rather puree like anyway.

Saturday, October 02, 2010

Canning Stewed Tomatoes

We are swimming in tomatoes (and fruit flies) around these parts. I was originally very worried about our tomato harvest since June was the rainiest on record and then September started raining early as well. Apparently the Karma Gods realized we had been very diligent with our hope and smiled upon us. The last 2 weeks in September were gorgeous, filled with lots of sun and a few 80 degree days. Total craziness for our area.

What it has meant is quite a nice selection of red tomatoes all at once. After a few days of clouds, you hit 80 and 15 tomatoes ripen all at once. After 3 days of sun, even though The Barracuda tries he cannot eat that many tomatoes.

The only creatures that were more excited than The Barracuda, were the fruit flies. We considered drying the tomatoes, but opted for stewed tomatoes and tomato paste instead. Though a few dried ones will be nice for backpacking, stewed tomatoes will be used far more often and could take care of many tomatoes all at once.


The Brandywine tomatoes we have grown in the past are really great producers of large, meaty fruits. This year there were 6 Brandywines, 3 Arkansas Travelers, and 3 Mortgage Litter. We were pleased with all of them, though the Mortgage Litters didn't do as well this year as they have in the past. They seem to like more early sun exposure and just couldn't seem to catch up this year.

Before tomatoes can be processed in the pressure canner, they need to be peeled. If you can them without peeling, they tend to all split up and you get weird deformed tomatoes and floating skins. It isn't exactly the kind of thing you want to dump into some rice or soup. Luckily, peeling tomatoes is quick and often kinda fun. (However, you should take into a count that I might just be a sadist. This might be toilsome as all get out and our family is just weird.)

Cut a sizable X in the bottom of the tomato.


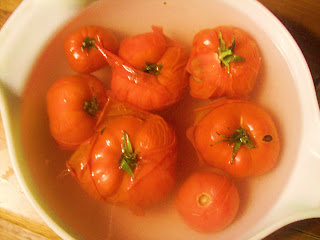
Next it is into the boiling water bath for about 1 minute. This water needs to be boiling, not just hot. I tried hot and was sorely disappointed. There were soggy tomatoes all over the counter until the water was reheated up to boiling. When the skins begin to blister and split, use a ladle to retrieve the tomatoes and place them in the ice bath. Do not try to handle them as they are crazy hot. The only reason for the ice bath is to cool them down to the point you can handle them, so the water doesn't need to stay icy cold.

Only do about 8 tomatoes at once or they will get too hot and begin to fall apart before you can peel them. Secondly, only fill the containers up about half way since the tomatoes will bring the water level up once they are thrown in.

They peel really easily at this point so be delicate with them. When you want to put them in the jars, it is time to manhandle them. The smaller ones tend to plop themselves right in, but some of our Brandywines were quite large. These were ripped apart and cored as we went. Smush them into the jars. There is no need to worry about adding any liquid as they tend to juice themselves when pushed down in the jars and cooked.


Process both quarts or pints for 10 minutes at 11 pounds of pressure.


The color of these tomatoes is ridiculously vibrant. They are like technicolor tomatoes. They make me wonder just how on long in advance the stewed tomatoes in the stores were picked before they were processed.

When we didn't have enough to make a full canning load, the tomatoes were peeled and then cooked down to paste. The paste was then frozen. Due to viscosity and differing acid levels, it is better to freeze tomato paste than can it. Luckily, you don't need nearly as much paste from homegrown tomatoes as you do from the store purchased kind.