


Uh. Well, Winter Break is almost over. Jules goes back in one week and that means the slothful gluttony of sleeping in has to come to a close. It has been rather enjoyable though.
Holidays are always a bit odd for us. We are not really on the Jesus-Was-The-Son-of-God side nor are we positioned on the mass consumerism side. As a result, we do not do Christmas. It isn't that we are opposed to Christmas; it just doesn't fit our family. There are Christmases with the grandparents which contain all the presents, sparkling trees, and fan fare for the Barracuda. But, for us, we are a Solstice family. I grew up in a small mill town with three Jewish families. Having now identified ourselves as a "Solstice Family" I completely understand what it must have been like for those children to have been in a "Jewish Family."
So let me explain just what all it means to be a Solstice Family. Solstice refers to the position of the planet as it orbits around the sun. There are two solstice days of the year and two equinox days. These are the days which mark the official changes of the season. Summer Solstice is when summer officially starts; it is the longest day of the year. Autumnal equinox is when autumn officially starts. Vernal equinox when spring officially starts. You get the idea. Basically it is when the Earth has moved another quarter around the Sun and the year is progressing. So the Winter Solstice marks the shortest day of the year and the last quarter of the Earth's journey. In holiday terms, we celebrate the Earth resting after a long hard year. It is a quiet time for us to appreciate all that has come and gone, all that we have accomplished, and all the work which has been done well. We feast, enjoy each other, and celebrate the time as a family. Jules is off of work and we can see him during the day. We can sleep in, hunker down in front of a fire, and snuggle up together. There is no discussion of God or creation myth, though they are not specifically excluded. We just tend to focus our celebration more on taking a break from a hard year of work, and the recognition that another is to come. It is more the concept of how grateful we are for all that we have and can share with each other.
Over our Solstice, the Barracuda wakes up exceptionally early and comes to snuggle in bed with us. He will crawl in under the covers and snuggle for about a half hour before going to play computer games in his room. I secretly love this. Pretty soon he will be far too big to climb into bed with us, so for now I relishing our little man. Jules and I sleep in till an obnoxious hour and then we walk down to coffee. Nights we make a fire, play card games together, and enjoy our dinner talking all about the fun things we can do together the next day. It is a wonderful reconnection for our family.
There are no trees for us; no decorations, no Santa, elves, or North Pole. Suprisingly, there are also very few presents. The family gets one large gift for all of us to share. The gift is intended to bring us closer together and gives us a year to grow on. Last year, we received Guadalupe and she has been quite a wonderful contribution to our household (even if sometimes I consider turning her into a very nice, furry pillow). She has been quite the lesson in patience, responsibility, and companionship for the Barracuda. She will also rip the face off of anyone who might hurt my boy and that makes a mommy sleep a little better at night. As you can see from the picture, she isn't spoiled at all.

This year, we gifted ourselves with music. The Barracuda has always had a thing for music. Somehow it is just in his blood. He didn't get it from Jules or I, but we very much enjoy trying to foster this love in multiple ways. Jules received a much anticipated banjo, I promised myself more time to play my neglected guitar, and the Barracuda got his very first guitar. The Barracuda has been perfecting rhythm with a bongo style drum. He can play along as I play my guitar and can find the rhythm in songs from our Ipod. We figured this year he can begin to learn strum patterns and possibly the fingerings for chords. As a family we can begin creating music together.
Popular Posts
Blogger templates
Blogger news


Thursday, December 31, 2009
Solstice and Another Year Ending
at Thursday, December 31, 2009Thursday, December 17, 2009
Catapult
at Thursday, December 17, 2009So what does our family do without television? We build an 8 foot catapult and launch miscellaneous objects (basketballs, baseballs, the Barracuda's shoe) over our side fence and into the neighbor's yard.
Tuesday, December 15, 2009
Rainwater Usage: Washing Clothes
at Tuesday, December 15, 2009More and more, I'm realizing that this whole urban homesteading thing is a trade off. You can't always use the route which takes less energy without completely encumbering your life. You can't always take the most environmentally friendly option without taking so much time that the work becomes infeasible. In such instances I am forced by sheer practicality to do a trade off.
The major trade off in our house is with laundry. Starting in about March, we can dry our clothes outside on the fabulous umbrella stand drying line. The whole family likes the therapeutic slowness of both hanging the clothes up and then taking them down. It is a process which cannot be done quickly and forces you to enjoy the warm breeze in the sun. Something about drying clothes this way just oozes summer. The trade off comes in that without the rain, the barrels we have are used to water our veggies and not wash our clothes. No rain means the clothes will dry outside, but there is no excess of water for all the other tasks of our household. Though there is physically enough water which falls from the sky during the rainy season for us to stockpile for the summer, we would have to have barrels all over our yard in order to store it all. So, once it hits about October and the excessive rains set in on goes the dryer. A major bummer. (Though I'm looking into year round drying outdoors. We will see.)
Likewise, this time of year (the rainy season) there is plenty of water to use. We can wash all our clothes with rainwater. The task of carrying five gallon buckets of water through the house might sound to some like a completely  cumbersome idea. I quite like it however; it is much cheaper than a gym membership.
Much like with the toilet, I had no frame of reference as to how much water our washing machine used. You just pull out the little knob, close the lid, and it does its thing. I will preface this by saying, we don't have an energy efficient washer and it definitely isn't a water efficient model. It is an older top loader. The capacity isn't teensy, but it isn't like some of the newer ones that can wash 7 pairs of jeans at once. We get about 2 giant Jules sized pairs and a few other things. It is just a standard household washer.
At this point in the rainy season, our rain barrels have been cleaned and the bleach water has completely cycled through. When you fill a bucket, it is completely clear, non-bleachy smelling water. So I figured I'd try it for clothes.
I turn all the knobs as if I was going to do a standard load, put the clothes in, and pull out the knob for the basin to  begin filling with water. I then quickly push the knob back in. At this point, the washer is now ready to fill with water. Normally it would be filling itself, but I now manually fill it. (This will not work if you have a front loading washer. There is no way to manually fill your washer as the whole water sensor and fill system is different and computerized.) I thought maybe a five gallon bucket of water, maybe two. Well, no. Our standard household washer takes almost 4 full five gallon buckets of water to fill. That's almost 20 gallons a wash. Holy Crapoly! That is 100 gallons a week on a busy week. It is at least 50 every single week. To be able to easily mitigate that much water usage seems a no-brainer.
I fill the washer up to just under where it would normally stop filling itself. The detergent goes in and I pull out the knob. Usually the washer fills itself for only a second or two more before the water sensor kicks telling the washer it is full enough and the cycle starts. For the most part it is almost exactly the same as when I did it before. This way is only slightly more labor intensive, but I have a feeling it is going to kill the water bill a tad.
Let me add a little bit here about washing machines. Many companies are phasing out top loader machines. They are seen as outdated and not as swanky. Not only that, it is very difficult (if not impossible) to make a top loading machine water efficient. (The water efficiency doesn't matter as much to us since we aren't using any city water.) However, you can make them energy efficient and there are a few companies still doing that. Many of these top loaders are available for tax incentives and rebates through state and federal programs. So, if you are like us and do not want to drop the cash (or household remodel) necessary to hook up a water barrel cistern/system but still want to be energy efficient, a top loader is where it is at.
One thing is for sure, washing clothes this way is definitely helping my biceps.
Wednesday, December 09, 2009
Baby, It's Cold Outside
at Wednesday, December 09, 2009When I woke up this morning it was 12 degrees outside. It is now a balmy and positively smoldering 18 degrees. We are not projected to get above freezing today and haven't broken freezing all week. Supposedly, by Friday we are going to be skyrocketing up to a high of 37 degrees. Whoo Dolly! Break out the shorts!
When I went out to get water for the dishes yesterday, the nozzles wouldn't turn. It took me a second before the realization occurred that I shouldn't force them. It appears that all five of  our 55 gallon drums are frozen solid. Complete ice boulders. When Jules and I first discussed attempting to pull off of city water for the majority of our household, this concept came up. However, it was dismissed because how on earth could our temperate zone get cold enough, long enough, without any rain/snow/freezing rain to cause a 55 gallon drum of water to freeze tight? We would be using them; water would be cycling. We don't get snow here, and even when we do, it isn't like it is that cold. Well, this year it is. Last year we had 3 weeks of completely snowed in. We're talking feet. Our city completely shut down. Even though we were going stir crazy (we were saved by a crazed break for the grocery store to pick up formula for the neighbors) we still had water.
It appears one of the drawbacks of having the barrels raised on a stand is that the frigid air can circulate around them, causing a complete lack of insulation. If they were placed directly on the ground, the dirt could keep the bottoms slightly warmer and possibly keep the lower portion of the barrel able to still freely flow. With some circulation you might be able to prevent the complete lock up of the system.
 Luckily our auxiliary barrels get sun for about 6 hours a day. They have managed to thaw out in the centers enough for me to cycle some water and keep them running. It isn't as though the water doesn't come out of the tap, but in January we are going to attempt an even further removal from city water. We hadn't planned on the concept of having 85 percent of our water unattainable due to being frozen. If it thaws at all this next week, I'm going to attempt to acquire three more auxiliary barrels and fill them as fast as possible. This will put our total count at 12. Next year we might try to figure out a way to have them slow drip, however that might actually work out for the worst. If the water forms icicles and expands in the spigot, it could bust clean. We would have no way to fix the barrels or drain them. When the weather warmed the foundation of the house probably couldn't take that much water all at once.
So, for now, we will hunker down with our fire and slowly circulate any water we can. I will say, though, learning to live with the seasons puts you so much closer to what is actually going on around you. There is no denying just how cold it is outside (that would be hard to miss regardless). However, the time frame of the cold has a different perspective for me now. Before, it was just the flip of a household switch. We'd go to bed in a warm house, wake up in a warm house, and only experience the cold when going to and from the car. To realize that in almost 168 hours the temperature hasn't been above 32 degrees is a concept which would have been foreign to me before now. Nature now impacts my life daily, time has a new feeling, and I'm experiencing the world through a new perspective.
Monday, December 07, 2009
Leaves a fallin'
at Monday, December 07, 2009Having a large tree in our front yard means a few great things. The main one this time of year is leaves. We are rolling in leaves. There are leaves in our compost bin. There are leaves in our street. There are leaves keeping our strawberries warm at night. There are leaves in our fallow  garden beds. There are leaves and leaves and leaves.
Before our urban homesteading, I never really thought much about how much you can do with a large pile of leaves. They are an amazing resource that is so often overlooked as a nuisance. In our household, leaves are a family affair. We all don hats, gloves, and sweaters to go out and manhandle the leaves into appropriate places. They fall for a good month or more, so there are many to go around.
Our non-food waste compost bin gets them first. The Barracuda scours the yard for any large sticks, dog toys, or other items which might not get along very well with the lawn mover. Jules then plows over them with the mower cutting them into little bits. The leaf bits are layered into the bin with about an 18 inch layer of leaves, six inches of dirt, 18 inches leaves, six inches dirt, etc. In the spring when it comes time to do planting the compost will be ready.
The next place for our leaves is into the wheelbarrow to dump on the strawberry patch. Strawberries can't handle much by way of cold. They begin to harden themselves off when shorter days begin and after a few colder nights, but sometimes nitrogen depletion can cause them to weaken instead. After one or two nights below freezing, covering strawberries with some form or mulch or row cover can greatly improve their chances of spring production and an injury free winter. They gained the name strawberries because straw has always been the preferred mulch. Our household is a bit low on straw, but oh do we have leaves! So wheel barrow after wheel barrow of leaves get dumped onto the strawberry patch to provide a nice blanket from our icy, cold nights. The Barracuda is partial to helping spread them out.
The compost bin and strawberry patch take care of most all the early blustery days. However, now that we are into December, most of the leaves have fallen causing both strawberries and compost to be quite full. The last place the leaves go is into the raised beds to condition the soils for next years planting. Though there isn't much by way of nutritional benefits to leaf mold, it causes great water retention in the soils. Being able to retain more water, gives our plants an added benefit over the summers when no rain falls. Secondly, leaf mold provides a wondrous place for micro-bacteria, fungi, and earthworms within the soils. So, though it does not directly provide much to the plants, indirectly the benefits are numerous.
Our raised beds get a layer of leaves, and then a small layer of dirt over the top to keep them down. Just before the snow kicks in, thick black tarping from the hardware store will be nailed down over the whole bed to keep the weeds, various critters, and Guadalupe out. It will also help keep in the heat to allow everything to cook down nicely.
The Barracuda's favorite part of this whole "yard work" thing is being able to stomp the leaves down before the dirt goes on top. Stomping, or even standing, in any of the raised beds usually elicits me screaming out the kitchen window something to the effect of, "What are you doing?!?" or "Get out of there!" When it comes to the leaf mold, I encourage it. The Barracuda is heavy enough to crunch up the leaves and compact them enough to keep the wind away, but far lighter than Jules or me.
Throughout the process of our leaf dispersal, Guadalupe supervises. She is quite fold of wrestling with the Barracuda and loves it when he throws piles of leaves at her. She wiggles about in them, tosses them with her nose, and they cause her to sneeze. Another favorite activity is gnawing at any fallen sticks which the Barracuda has piled up and then trotting around with a stick placed in her mouth quite proud of herself to be in the front yard. In general, she has a grand time.
The Barracuda is right there with her when it comes to enjoyment. Many breaks are taken to run around with each other, throw leaves about, and play competitive games with how fast we can rake or how large a pile we can make. After all, all work and no play means that he doesn't want to come out and help. Currently, doing yard work is merely part of being a member of our family. It is expected for him to come and help.
 So far, he hasn't figured out yet that this is work. Hopefully we can keep that up a couple more years.
Saturday, December 05, 2009
Atlatl
at Saturday, December 05, 2009So what does our family do without television? We make atlatls (ancient dart throwers) and fletch three foot long darts so we can practice killing pizza boxes in our backyard.

Jules can fling a dart upwards of 80 yards.
Monday, November 30, 2009
All American Thanksgiving!
at Monday, November 30, 2009My mother is teaching in Dubai. As a result, I have inherited the holidays. This isn't really a bad thing, but it does mean that life this time of year gets a bit scattered. Thanksgiving and Christmas weren't too forgiving this year either as I work the beginning of every week (Sunday-Wednesday) and both fall on Thursdays. As such, there has been much early preparation and a significant amount of thought put into what exactly I can do four days early. Luckily with all the canning we did earlier this year, there isn't too much to buy or too much to cook.
Being quite the American family, we combine people from all over the United States, people from various relationships, and people from different families all around one table. Personally, I like the Barracuda growing up with this idea that we are all family and we can all sit around one table and be thankful together. It does make the menu a bit crazy at times though.
Jules is very Southern in some things he likes to eat. This means creamed corn, cornbread stuffing, biscuit and sweet potatoes. Lindy is my father's long-time girlfriend and she likes food which is very 'normal.' That means no fancy seasonings or exotic dishes at the table. A co-worker of ours as well as our neighbor, might come over and neither eat meat. This means lots of vegetable choices which do not contain chicken or turkey stock. My brother likes traditional favorites. My father is partial to his Swedish roots which means the sweet, Swedish rolls which have always been at our table. I personally like lighter, healthier fair. Oh my goodness this has been quite interesting to plan.
It all worked out quite nicely though. Food was good, very plentiful, and most of it came from the cellar previously canned. Out of all of it, we didn't spend much money and had quite a bit to be thankful for.
In our household there is no discussion of Pilgrims and "Indians." We do not discuss everyone sitting down to a feast, and all the thankfulness, and all the charity, and all the grace. We have always been honest with The Barracuda and a historically accurate description of Thanksgiving would require massacres and small pox blankets to be discussed. He is five and that is quite unnecessary.
We focus on thankfulness and on family. Family (in our household) is not biological. Family are people who love and care about each other regardless of genes. On Thanksgiving we are thankful for people, for friends, for all that we have and anyone who might need a place at the table to sit.
It meant sitting in front of the fire place eating, laughing, talking and drinking till everyone was exhausted. It also means that whether or not Jules is the real other half of the Barracuda's genes are doesn't matter. Whether my father is married to his long term girlfriend is completely moot. Coworkers, ex-coworkers, neighbors are all friends and thus family in turn. It makes for quite a warm house filled with warm hearts.
In the end, we all wound up thankful for quite a bit. When asked by his teacher to list three good things in his life The Barracuda wrote this: (He uses Jules and dad interchangeably.)
"My room and my toys and my family. My room is a good thing because it has my bed so I can sleep. It is my room, now. When I didn't have my dad, I just lived in another house. I didn't have my own room, because I didn't have a whole family. I shared my room with my mom. Now, my room is just for me. My room is a good thing because it keeps my toys. Because I get to do cool stuff with them. I get to play with them. I get to do lots of stuff with them. I haven't always had lots of toys because when I was at the other house I didn't really have a room. I didn't have many toys or things because our room was small and always messy. Now, I'm living in [Jules'] house and it has all my toys in there and now I have my own simple room. We live at [Jules'] house now because we moved from the other house. I like that house because it is all fancy and we have our dog and our cat. My family tells me what is right and what is wrong. I like my family and I love my family. My mom cleans up the house and my dad goes to work. I love my dad because he does stuff with me and he comes to get me from when I play at other people's houses. My dad's job is to keep me safe. I love my mom too. She takes me to the coffee shop. She protects me and looks out for me."

Wednesday, November 18, 2009
Disposables: Knitted Washclothes
at Wednesday, November 18, 2009Paper towels are incideous things. They are so simple, right there, and easily thrown away when they get all gross with something you never want to touch or think about again. However, they are also completely overused. When potty training Guadalupe, you dang well better believe there were many paper towels used to pick up certain disgusting messes. But, when it comes to something as simple as wiping down The Barracuda before he goes to bed, before he eats a snack, before he comes to sit down at the table, before he does most anything (he is the dirtiest five year old boy) paper towels are a complete waste. The same is true for wiping down counter tops, or when eating a meal.
In come these snazzy little numbers I have begun to stack in the bathroom and probably in the kitchen as well. Made from 100 percent cotton Lily 'n' Cream Red (a.k.a. Poppy) they do the 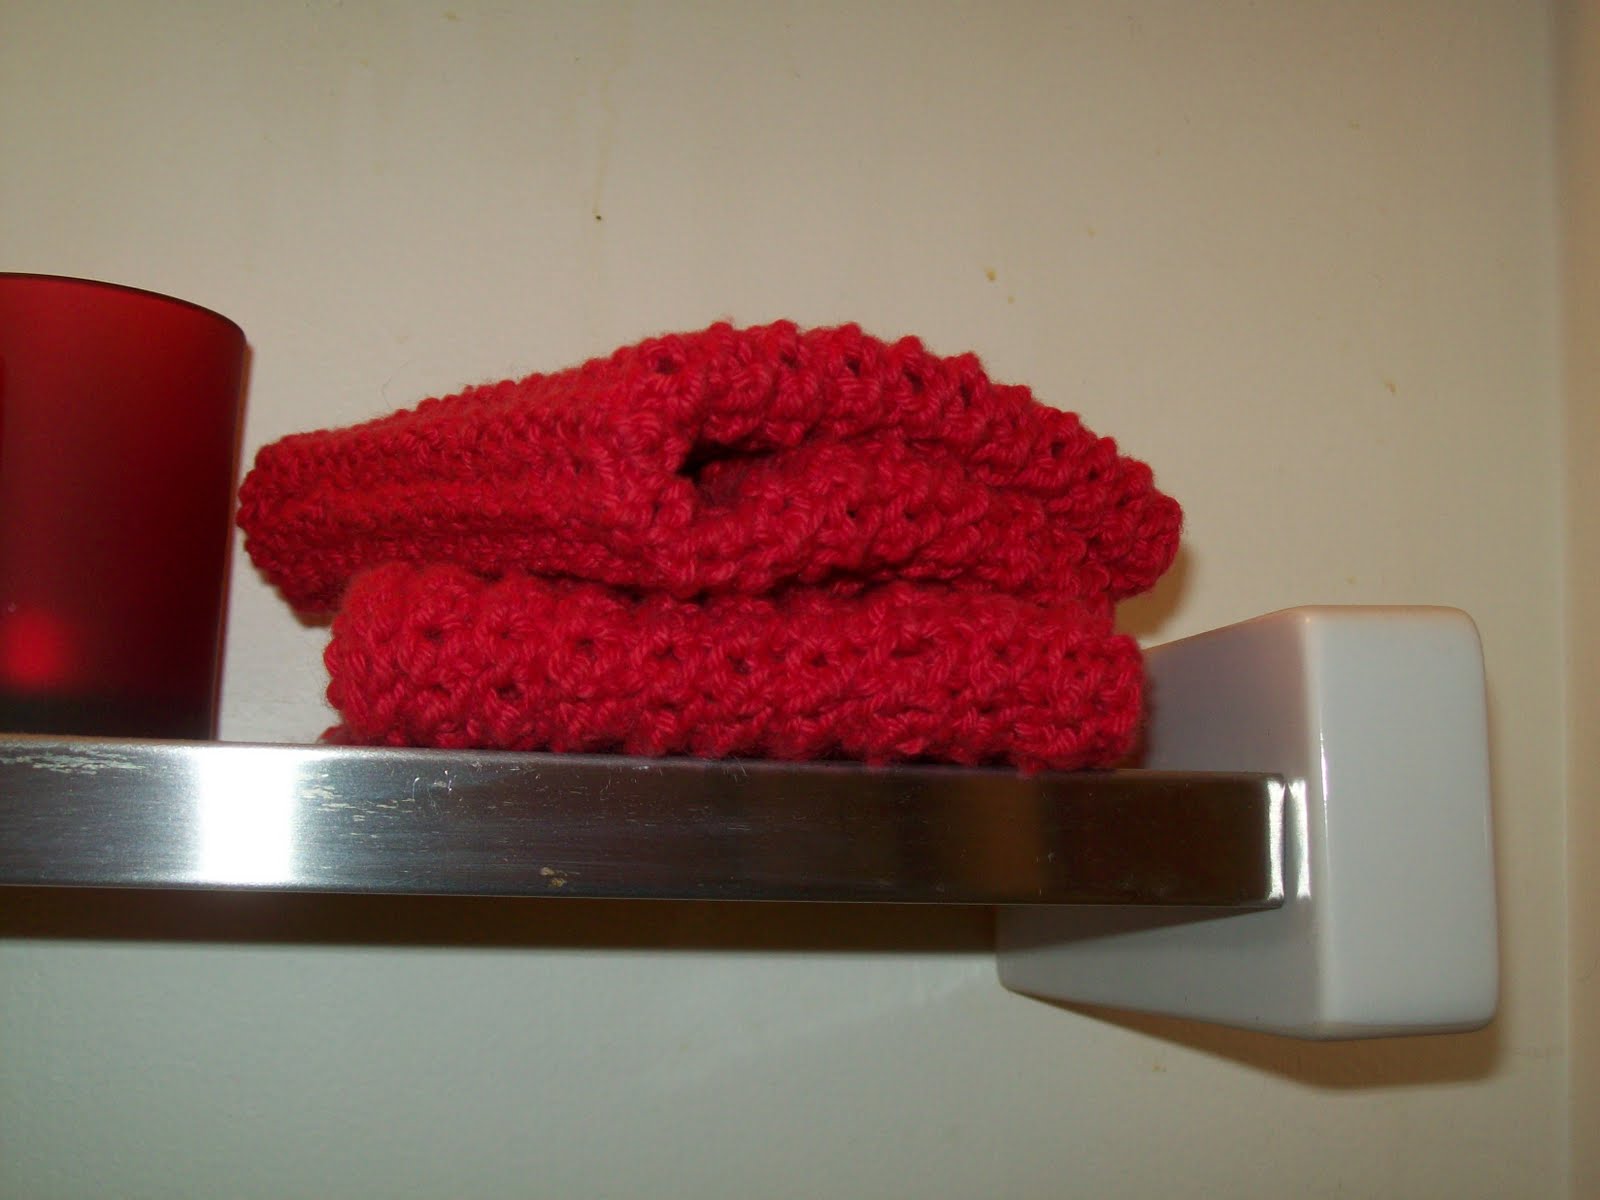 trick quite nicely and knit up in only an hour or so. The pattern is simple, just a standard stitch; no yarn overs, slip stitches, or knit forwards. Two balls of Lily 'n' Cream will yield 3 washcloths making the price just about a dollar a piece. Being so cheap and quick to knit up, if they get stained in the kitchen it isn't a big deal.
Also helpful is the slightly lacy pattern of holes and raised nubs. The nubs not only scrub off the Barracuda, the holes help when he then throws the discarded washcloth in a wet heap in the bathroom or other corner of the house. I've found they dry quickly and can be used several times in the bathtub (provided there is hanging up and no heap throwing) before I need to throw them through the washer.
There is probably a name for this stitch, but I do not know it. I call it "twice knit" since "double knit" was already taken. I stumbled upon the concept when I was making a blanket of various patterned stitches and I needed another one. After repeating the same technique for three or four rows I decided I like it. Now it is used regularly.
It is another wonderfully simple pattern. This one doesn't even require purling! All that is necessary is to knit each stitch twice. You knit it once, standardly, then place your needle back under the stitch and knit it again. Doing this over and over, creates a lacework pattern.
You need 1 skeins of 100% cotton yarn, 2 size 8 knitting needles, and about an hour.
Cast on 36 stitches.
Knit the first row.
Twice knit all remaining rows until 9 inches long (or desired length).
How to Twice Knit
First, knit your stitch normally. You can now just slide it back onto your left needle and knit it again or you can follow the pictures below. I found it faster to use the method diagrammed below, but either way works. Once the stitch has been knit from the left needle to the right needle, stick your left needle back under the stitch (the one you just knit). Now, you should have something resembling the first image below. Next, wrap the yarn around the right needle (the bottom needle) as if you were going to knit the stitch normally

Once the yarn is wrapped around the bottom needle, hold it with your finger so you can pull the yarn under. Now slide the bottom needle (still holding the wrapped yarn) to the front and through the stitch.
 Slide the stitch off of the lower needle, and you are done. By knitting each stitch twice you are adding an extra row to each stitch before you hook them together. This is what creates the holes and gives a lacy effect.
Tuesday, November 17, 2009
No More Tobacco
at Tuesday, November 17, 2009 Jules is having a hard week. You see, he began using Copenhagen tobacco around the age of 15. That would be around 20 years ago. Having a disastrous childhood (he would personally admit this) I cannot blame him. However, there is now a small boy in his life. A small boy that idolizes his father, that asks way too many questions, that began taking a drink of orange juice and spitting it back into the bottle to "be like his dad." Jules has said he wanted to quit multiple times, it was his New Years resolution last year. He has weened himself back from like 12 dips a day to only 3. He made it through a trip home without going insane, killing anyone, or over-using his tobacco rations. I am incredibly proud of him.
Now he has decided to go cold turkey. We are on day 5. I say 'we' because a little known fact to anyone who hasn't personally experienced it is that the entire family quits tobacco.
There has only been one meltdown, some snippy responses, and a few "Damn child!" mutterings late a night when the Barracuda has long since gone to bed and cannot hear. In general, it is going fairly well. I am very proud of him, his students are very proud of him, and the Barracuda really enjoys having an entire feedbag of candy laying around the house.
Thursday, November 12, 2009
Michael!
at Thursday, November 12, 2009So what does our family do without television? We spend an hour and a half rocking out to YouTube, dancing around our living room imitating Michael Jackson and going "Whoo-Whoo!" and "Aint no body's business!"
Thursday, November 05, 2009
Homemade Cleaning Products: Laundry Detergent
at Thursday, November 05, 2009Homemade laundry detergent appears to be a very personal thing. There is always the matter of your water: hard or soft, mineral content, well or treated city. Something in this mix will make whites dingy for some people and sparkling for others. There i s the matter of consistency: gel, powder or liquid. There is the matter of heat: hot water wash or cold. There is fragrance: do you want one, do you not, do you want multiple fragrances. There is the matter of size: what will you keep it in, big batch or small, how long does it keep. Oh there is just so much more than when you walk down the grocery isle having to consider only a couple of options and knowing there isn't really one that "won't work." Most all of the Internet recipes I have seen involve the same basic stuff, but somehow the order or amounts make a very large difference. So try a few, keep some Tide on hand for the ones that don't work out, and know that most every single recipe I have seen costs only a dollar or so for the entire batch. Embarking on this highly personal mission requires a bit of reconnaissance into the lives of others and so I give you our laundry soap recipe.
To answer the questions above we have soft water, treated by the city (soon to be rain water), and the previous liquid made our whites dingy. We switched over to gel and now are very happy. All of our clothes are washed in cold water so powder won't do because of the whole dissolving issue. We are only slightly into the fragrance thing. A small fragrance is what we have decided upon, so that our clothes will smell clean but not overly smelly. We store our soap in a 5 gallon bucket and thus make large batches. However, the latest recipe (the keeper) is much smaller than the previous dingy whites recipe.
There aren't many pictures with this post because the process was so highly simple I couldn't really think of any pictures which someone would need. Pictures, I felt, would be a bit demeaning. Most everyone I know can grate, heat, dissolve, dump, mix and let sit without photo instructions.
Ingredients
1 Fels Naptha soap (you will use 1 1/2 cups of grated soap; a little less than half)
1/2 cup of Borax
1/2 cup of Washing Soda (washing not baking)
Tools
cheese grater (mine came from Goodwill for a buck, make this your permanent soap grater)
Any old pot or pan which can hold at least 8 quarts (totally reusable)
BIG bucket (at least 2 gallon)
Wooden spoon, spatula, large stick to stir contents of bucket
Regular spoon to stir contents of pot
Directions
Grate the Fels Naptha on the smallest teeth of the cheese grater. It will take more time to grate, however it will take much less time to melt. After trying it both ways, you save time with the smaller teeth.
Heat Boil 2 quarts of water. Make it really, rapidly boiling, crazy hot. Mix in 1 and 1/2 cups of the finely grated Fels Naptha.
Dissolve Turn down the heat to medium (this really likes to boil over and get everywhere on the stove) and stir until the soap dissolves. You want it completely dissolved like bright yellow, watery mustard. If it doesn't dissolve now, it won't in the washer.
Dump in the 1/2 cup Borax and 1/2 cup Washing Soda. The mixture will thicken almost immediately. You can feel it as you stir. However, it will not be like gel, mayonnaise, or honey. It is still very much a liquid. Simmer over medium to low heat for 5 minutes.
Mix Prepare 1 quart of hot water into your big bucket. Add 1/2 the yellow soap mixture. Stir till it completely combines. If you dump all the soap in at once it tends to separate due to the temperature difference. Dump the rest of the soap in and stir really well.
Let Sit put the lid on and let it sit for 24 hours.
That's it, all done. It takes about 15 minutes total and then waiting for it to set up. We use 3/4 of a cup per load. A full cup if the laundry is scary and needs lots of help. The bucket usually lasts us about 4 months. The Fels Naptha gives it a wonderful, slightly lemony scent. It works out very well.
Figuring Out What You Like
When I opened my bucket the next morning, the soap was like Jello. Personally, I found it way too dense. I was picturing the stuff that comes out of my nice, brightly-colored, plastic container which I bought at the store. Other people I have spoken with really like it this thick consistency. This is a very personal part of the whole process. For me, I boiled another 3 quarts of water till they were rapidly boiling, crazy hot, and dumped them in. After stirring a bit to make sure all had dissolved and combined I let it sit overnight again. In the morning I added 3 more quarts of water. At this point, I was satisfied with my slightly runny gel (like dishwasher soap). I'm pretty sure the next time I make it, the same thing will happen. However, I am still going to let the soap set up, and add the hot water in increments so that I get the consistency right. Due to this not being an exact science you have to play around with it a bit to make it your own.
Acquiring the Stuff Fels Naptha has been around forever. It is usually found on the same isle and the Borax in with the cleaners. For some reason (I don't know why) it isn't on the laundry isle with the other soaps. It literally says "Heavy Duty Laundry Bar Soap" on the wrapper. However, many stores have just stopped carrying it. If you can't find it locally you can still find it on the Internet with the Dial website. It only costs about 1.50 a bar (though you have to purchase a minimum of 8) and you use about 1/2 of it for each batch of soap.
Washing Soda is another product that seems to be disappearing from shelves. It is normally in the laundry isle, as that is its main use. If this is not something which can be local acquired you can still get it through Arm & Hammer via the Internet. If you are deciding to do homemade laundry soap this is a product that is in most all of them. Even if the above recipe isn't something which works for you, the rest of the box will not go to waste. I haven't had any problems with Borax. This seems to still be something that people realize is important to have around the house. Perhaps it is due to the fact Borax has a bajillion uses for cleaning and disinfecting. This is another product which is in most all the homemade laundry soap recipes I've seen. As well, Borax cleans a bathroom like no other product I have ever used. That includes all the fancy ones that Jules had in the cabinet before I lived with him. If you still haven't yet, buy it, use it, and love it.
You can acquire all three products from Soaps Gone Buy if you need to. Many appear to be available through Amazon as well.
Wednesday, November 04, 2009
Disposables: eBay
at Wednesday, November 04, 2009![]()
Ebay is one of those reasons the Internet can be considered an amazing revolution. By eliminating the middle man you are allowing for people all over the world to interact in exchange of goods which they no longer want, but realize others might still have use for. In this way, not only are you saving large volumes of product from a landfill, but you are empowering people to find solutions outside of the "Big Box" stores. Secondly, you are forced to trust the goodness in others and see that most of the population are good, upstanding, positive people who do not wish to merely "make a buck" or take advantage of another person.
With so much negative press and "fear mongering" in the media, it becomes easy to always assume the worst. Equally problematic is when one begins to assume the worst, their good intentions of self preservation begin to landslide into not helping others for fear of negative consequences. This can cause a complete breakdown in the positive help which a community is supposed to provide. Small areas of reasonably safeguarded trust, such as eBay or Etsy, help to restore this idea that if you trust another (and they trust you) a mutually beneficial relationship can blossom and community can be built.
However, many such handlings can go awry. As wonderful as the concept of trusting the good nature within each person is, some people have questionable intentions or a downright deceitful attitude. Sometimes, things just don't go as planned regardless of either person. As such, the buyer does need to beware and the consequences measured. In the "Seller  Info" box you will find a number next to the seller's name. This number indicates how many items they have sold before. You preferably want someone who has done this over 100 times. This means they aren't new to the workings of eBay, to packaging and mailing things, to organizing money and items. Secondly, their feedback rating should be in the 90% or above range. Feedback is listed directly under the name of the seller. After every item is purchased people have the ability to give positive, negative, or neutral feedback along with written comments. This is a wonderful added checks and balances system for eBay. By clicking on the number if items the person has sold, you can see the feedback from other purchasers and gauge whether to trust the seller.
Completely Random Seller. Photo Courtesy of Google Images.
Buyer consciousness was once again reinforced and relearned by me with the debacle of my sewing machine. Oh wonderful Ebay, all looked good. However, if being completely honest with myself, I was being cheap. Rather than spend a large sum of money on a sewing machine which I would never have to replace and would suit all our family's needs for many years to come, I chose to go with a very scaled down model. Still a good machine, but definitely not the top of the line. I don't know why I did this. It was very much the kind of decision my father would have made. If it is one major lesson I have learned with Jules and our house is that you save your money to do it right the first time. Pressure canner, Kitchen Aide mixer, our safe, our firearms, all of it. You do it right from the beginning and don't need to do it again. For some reason I had momentarily forgotten this in an attempt to save money and I caused much more hassle.
Needless to say, the sewing machine I purchased a couple of weeks ago on eBay didn't go as planned. First it just plain didn't come. We waited. Jules checked when we purchased it. I stopped being ansy, yet couldn't shake a feeling things weren't right. More than two weeks later a mangled box appeared outside on the doorstep. The sewing machine.
Now, I assumed an item which cost $100 would be adequately packaged. Afterall, the Pyrex which I have purchased has all been far less money than that and packed beautifully! Moreover, this sewing machine is renown for being steel bodied, sturdy, and remarkably strong. But, when opened, it was broken. One of the main supports was snapped to the point of the machine now wobbling and unable to be used. There was virtually no packaging in the box whatsoever. Major Bummer!
The goodness of others prevailed, however. The seller was notified by Jules and refunded our money. Whew! Refund in hand, I decided to stop being cheap and just buy a good machine. Not a low end, really nice, no upgrade necessary, top of the line machine. It cost well over four times as much, but my Bernina 910 is coming in the mail. This time we went with a seller who knows what they are doing, who has had the machine professionally serviced by Bernina, who has a 100% positive feedback and has sold over 5 thousand items, who (in short) relatively assures us a good result.
I will never speak to the person who owned this machine before me. She will never know my son or Jules, but she will have provided them with clothes and quilts for many years to come. It is a rather odd concept to consider how much help a perfect stranger can provide, but what better definitions is there of community?
.JPG) I think I shall name her Gertrude.
I think I shall name her Gertrude.Wednesday, October 28, 2009
Ugh!
at Wednesday, October 28, 2009I am sick. Not the head cold, why won't this annoying thing just go away sick either. The kind of sick were you are amazed your body contains as many fluids as have come out of you. Jules informed me when he came home from work today that I "looked like hell." I don't know what he is talking about, I'm dead sexy! Headache, bed in the bathroom, just shoot me, dead sexy!
Hopefully I will be back to somewhere resembling normal by Friday.
Wednesday, October 21, 2009
How to Clean Rain Barrels
at Wednesday, October 21, 2009We live in a place where "damp" is at its best. Nine months of the year we are damp, our city is damp, most of existence outside is just plain damp. You can smell the rain coming around this time of year and then it just doesn't leave. In my opinion, it is part of what makes here so wonderful - Drippy, soggy, unending rain.
This is also the reason our rain barrels are so well suited to our house. They just don't go dry. We can flush toilets, we can do dishes, I might even begin washing laundry and they don't go dry. Dry just doesn't happen in our rainy season.
This constant cycling of water, is one of the main benefits of cleaning our rain barrels. The barrels need to be cleaned yearly, even if you only use them for irrigation. This is due to the algae blooms which will occur. There is nothing harmful about this algae, in fact it probably makes the water much nicer for the plants, but it can clog the spigots and make using the water difficult. Some people use fish or snails as a way to remove the algae which builds up inside. It seems to work for them, but I have no experience here. We use standard Clorox.
Two to three months of the year there is NO rain. It is as though the rain goes on summer vacation too. So, in late summer, as late as responsibly possible, we begin once again using our rain barrels for much of the household water. The barrels are at their lowest, and we begin to quite rapidly drain them for dish washing and toilet flushing.
I add 1/2 cup of bleach to each full barrel. This means that as the bleach dilutes in the water, it is able to kill any of the algae clinging to the walls. The barrel sits for 24 hours to make sure the bleach has really permeated and then the barrel is drained with usage. DO NOT USE THE WATER FOR IRRIGATION at this point. It will kill your plants. It will kill any wonderful mycorrhizal fungi at work in your soils. The point of the bleach is to sterilize and it will sterilize anything the water goes near. This makes such water ideal for dishes and toilets. The first 2/3s of the barrel I use solely for dishes, the bottom 1/3 starts to get a little ookier with dead algae  and sediment. Such things need to come out of your barrels, but don't necessarily need to be in your dishwater. This last 1/3 goes to just toilet flushing. The bleach water is excellent for the toilet tank and pipes, and the residue in the water doesn't matter.
If your rain barrel is a solitary barrel (not attached to a system or other barrels, just by itself) you can use a wrench to take off the spigot, disconnect it from the downspout, and tip the barrel toward you to allow every last bit of water out (a 30 degree angle works best). You can then spray out the barrel with a hose if need be and leave it to sit in the sun for 48 hours. This will completely sterilize the barrel and you are good to go for another year.
However, only three of our barrels are solitary. They are our just-in-case, backup barrels. The main ones we use are all hooked together and do not tip at all. These barrels will always have at least 6 inches of water in the bottom of them. There is no way, other than completely cutting them free, that they tip and can be totally drained and rinsed. For this reason, we clean them a bit differently.
We begin draining at the last in line (Barrel 5) and take as much water out as possible. I work backwards (Barrel 4, 3, 2) bleaching and draining all the way through. I never bleach Barrel 1 which is hooked to the downspout. (This means at least one barrel at all times has fresh rain water.) At the point all but Barrel 1 are drained there is still 6 inches of bleach water sitting in the bottom of each barrel. When the rains come this water is diluted as the barrel fills and cycled through the entire system. All the overflow bridges get bleached, the main overflow gets bleached, and the entire system is cleaned. Slowly, but surely the bleach water is dissipated through out the barrels and in a month, there is no trace of bleach.
Six inches of slightly bleached water diluted in a 55 gallon drum is not a toxic level. You can still smell it, I don't really want the dog to drink it, or to irrigate with it, but it won't hurt much that is very large. As the water goes through the pipes of the toilet, or sanitizes the dishes in our sink, the cleaning works double duty in our house. It takes only two weeks to completely drain all 9 of our rain barrels, and a month for the entire process to cycle through the barrels. In my opinion is is very low maintenance for the return.
I have heard there are fancy chemicals you can use, weird tools you can acquire, or various organisms which people use to do their cleaning (and maybe we will one day get there) but for right now, we will stick to our $2.50 jug of bleach and our unending rain.
Other Helpful Resources
Approved Bleach for Sanitation of Drinking Water
The University of Texas has done significant research into varieties of bleach. Apparently, all bleach is not created equal. (Who knew?!?) If you are using your rain barrels for drinking or to create potable water, be sure to check this site out!
Storing Water for Emergency Use
Colorado is currently facing quite a water crisis. For this reason their agricultural extension has a wealth of information about storing water. Included is information about amounts to store, ways to sanitize, and different storage techniques.
Preventing Food/Water Borne Injury and Illness
As I began looking for information on safely treating water for household use, I kept getting websites or books about sailing on boats. It was frustrating and made no sense to me. Then I realized (with Jules' explanation) this is because when doing long distance boat travels, sanitizing water, storing sanitized water, and learning how to utilize treated water are imperative skills. Sometimes valuable information is found in the oddest of places. This is one of the absolute best places I have found for information about sanitizing and using water. The writers not only do a lot of long distance boating and have used the methods, but are medical professionals (ER doctor and pharmacologist; registered nurse and paramedic).
Thursday, October 15, 2009
Sewing Machine!!!
at Thursday, October 15, 2009In just a couple of days my new sewing machine is coming! So excited!
Well, let me explain a bit more....the sewing machine is far from new. In fact it is rather old. It is a Bernina 730 which I won off of eBay. Anyone who knows about Bernina knows they are quite on the spendy side of sewing machines, so used is the route we needed to take. However, a Bernina will last you just about forever making the age much less important
.
The machine was a secondary machine for a woman who upgraded to a spiffier model a few years ago. It has the older steel body and comes with all the accessories. YAY! Below is a picture of the 715 which is very close (one step down) from the 730 which I purchased. Finding a picture proved much harder than I thought!
Jules tends to blow the knees out of his work jeans and the only way to reinforce them is with a machine. My hand sewing will work in a pinch, but not hold up to much abuse. Secondly, Jules through-hiked the entire Appalachian Trail directly after graduating high school. He has many T-shirts from various outfitters along the way, and a few which no longer exist. For such a large accomplishment the sentimentality is too high for the shirts to actually be worn around and demolished, so I told him I'd start a T-Shirt quilt we could use on the bed. This way he gets to use the shirts, enjoy the nostalgia, clean out the dresser (a perk for me), and not ruin something which can never be replaced.
I'll be sure to post some pictures of the process and the finished product.
Monday, October 12, 2009
Garden: How to Double Dig for Garlic
at Monday, October 12, 2009Summer is officially over, Jules returned to work some time ago, and tonight we are having our first fire due to the cold which has closed in around us. The days here are still T-shirt weather, though sometimes a bit windy, but the nights are now down right chilly. It will probably be 40 degrees tonight and that is fire starting weather.
This can mean only one thing for the garden....well, this can actually mean a few things for the garden, but I'll focus on just one: Garlic. This is garlic planting weather! Garlic has some unusual requirements as  growing goes. For one, it likes cold. Without at least days of cold temperatures (40-50 degrees), garlic will not germinate. The sustained cold weather in the winter is what also initiates the side bulbing of the garlic which eventually turn into the cloves. The shoots can still be eatten, and it still tastes of all that garlicy-goodness, just nothing under the ground but roots. The cold triggers the plant to begin stockpiling growth to make it through the season so it can grow again. Once the longer spring days come about, the bulbing is promoted and you have garlic by the summer harvest.
We don't plant any expensive, gourmet garlic; just the grocery store stuff for us. Even better, planting is as simple as separating a bulb up into cloves (plant the big ones) and putting them in the ground. No muss, no fuss, just done. Water occasionally, but it is the winter and that means rain here Garlic likes water. Weeding is helpful so they don't have to compete over the winter, but with a little mulch even that can be taken care of. Next year, just plant the leftover cloves you have from this year and there is no need to buy again.
Garlic prefers crumbly loam soil just like most root veggies. Since our backyard is not in any way perfectly arable, I double dig the garlic beds to provide a nice soft place for growth. Double digging is a bit of work, and you will definitely feel it the next day, but it is much cheaper than a gym membership.
To begin you mark off the bed in sections of about 18 inches wide - for a nine foot bed this would give you six sections. Stand in section 2 and dig all of the dirt out of section one about 12 inches deep. Put it either in a large pile next to the bed or in a wheel barrow. Cover the exposed area of section one with compost and aerate the soil another 6 inches, thoroughly mixing the compost in. Now dig all of the dirt out of section 2 about 12 inches deep and dump it into section 1. This should yield section one now filled back up with dirt which is nice and loose, composted, aerated and all yummy for planting. Now be sure not to step in section one at all costs! You have just completed a very laborious task and would undo all your hard work with one misplaced foot.
Section 2 has just been cleared of all its dirt, now lay down a nice layer of compost and aerate the soil another 6 inches - thoroughly mixing in the compost. Step into section 3 and dig out all the dirt 12 inches deep and dump it into section 2. Section 2 is now done!
Section 3 has just been cleared of all its dirt so lay down the compost, aerate six inches deep and mix all the compost in. Step into section 4 and start diggin'. Dig out 12 inches of soil and dump it into section 3. Section 3 is now done. Are you noticing the pattern?
If you continue in this way - dig out 12 inches, place removed dirt on the previous section, layer compost, aerate 6 more inches, mix it all together, move on - you will methodically work your way through the entire bed. When you get to the point that all the dirt has been removed from section 6, it is composted, it is aerated, you just dump all the dirt you first took out of section one on top. All the soil is now back into the bed, just shifted around it. Consider double digging the musical chairs of the soil world.
The size of the garlic bulb is not only dependent on the nice fluffy soil, but also on the spacing. The closer your cloves, the smaller the bulbs will be. So, you will get more bulbs from your space, but fewer (or smaller) cloves. Fewer planted, larger bulbs. We tend to compromise and plant Biointensively. Doesn't that sound swanky!
All Biointensive gardening is, is planting with space in mind. Planting in the standard rows is used for most large corporate agriculture because they have the big fancy machines which need to get through the fields. No fancy machines here, just a small space. So instead of only planting three rows in our bed and having them all start in the same spot, we plant five rows and have them off set. To create this effect, begin 5 inches in from the sides of your bed and space your main three rows 10 inches apart. Follow these rows down the length of the bed, placing a garlic clove every 10 inches. (The blue ones. ) Now go back to the beginning of your bed and move 10 inches in on the sides still keeping your rows 10 inches apart. These will be your two offset rows. (The red ones.) Continue to place the cloves 10 inches apart for the entire length of the bed. Voila! Biointensive gardening! Now you can sound swanky too!
After some quick math in your head, you might realize these measurements don't add up nicely. This is because I allow for a two inch wiggle room for each clove. This way if it isn't in there exactly right it doesn't matter. The cloves in the offset rows are about 7 inches from their diagonal siblings and almost double the amount of garlic you can grow in the space.
With two beds like the one pictured above, we have just over 100 cloves of garlic planted. This gives us 8 heads a month or two bulbs a week. No vampires in this house!
Friday, October 09, 2009
School
at Friday, October 09, 2009The paperwork is here, ready to be filled out. The birth certificate is on the way because I have no idea where I put it. One more immunization and he is all set. Within a week, the Spicy Barracuda will be starting virtual kindergarten. Yes, virtual. The kindergarten "class" is all done through the internet, conferences with his adviser are Skyped, and he can advance as slowly or quickly as he needs to. There is even a stipend for him to take part in local art, music, foreign language, and sports classes as a way of socialization.
This comes as a big sigh of relief for Jules and I. We spent the end of last year and the beginning of this one (eight months in total) fighting to try and get the Barracuda into our local public school. It didn't happen. This meant extensive looking into options for schooling. Either that or he would be entering kindergarten reading, knowing how to add and subtract, and being one of the absolute oldest members of his class. The circumstances were frustrating, the bureaucratic mess that is public school was down right daunting, and we don't have the money for swanky private kindergarten.
Much perseverance has paid off and now we are a few short faxes from being all set for this year and beyond. Along with this comes the advent of new blog. Virtual school requires quite a bit of parent involvement and documentation. It is much like homeschooling, only you have some curriculum provided and quite a bit more support.
Schoolwork for the Age of Five is the Spicy Barracuda's own blog all about our schooling experience.
Tuesday, September 29, 2009
Disposables: Green Scouring Pads
at Tuesday, September 29, 2009The typical green scouring pads are what we used to use for cleaning the dishes. In the new attempt to remove disposable items from our house, specifically plastic  ones, these green pads are gone. In their place are the new green scrubbers in our life.
These little knitted numbers are 100% cotton making them incredibly durable and incredibly absorbent. They work just as well as the old ones and don't scratch up all the pans. The best part is that at a price of $1.79 for 120 yards you can knit up three compared to spending over a dollar a piece on Scotch Brite. I've also found that they last longer than the plastic ones because they don't wear down to a smooth green blob like the others tend to.
The pattern is incredibly simple and even a beginning knitter can handle creating these scouring pads. As long as you can knit and purl, you're set! I use Lily's Sugar 'n' Cream yarn, but any 100 percent cotton will due. Ours are Lily 'n' Cream Lime (now known as Hot Green).
The pattern for our scouring pads was derived from one posted at Little House in the Suburbs. However, there's is a bit more on the pretty side, whereas I wanted ours to be significantly more durable. So there has been a bit of tweeking, a few more added scrubbers, some size altering, etc.
You will need 1 skein of 100% cotton yarn. 2 size 5 knitting needles and 1 double pointed size 6 needle.
At first, I was a bit nervous about the mention of a cabling needle. Cabling is significantly above my skill level and quite a bit intimidating. Not only that, I didn't even own a cabling needle. So, some testing out of options and a bit of trial and error led me to using one double pointed size 6 needle instead. However, you can use any object that is long and skinny like a knitting needle - pencil, pen, marker, hair pin, piece of doweling - but seems to work best if the object is about six inches long. All you basically need is something to hold the stitches for a bit.
The instructions on making a scrubber are below the pattern.
Cast on 29 stitches.
Knit a complete row
Purl a complete row
Knit 5 stitches, create a scrubber, knit 5 more stitches, create scrubber...continue till the end of the row.
Purl a row.
Knit 1 stitch, create a scrubber, knit 5 more stitches, create scrubber, knit 5 more, scrubber....till the end (you should be left with a one stitch remaining after the last scrubber.)
Purl a row.
Knit 5 stitches, create scrubber, knit 5 more stitches, create scrubber....continue till the end.
Purl a Row.
Knit 1 stitch, create scrubber, knit 5 more stitches, create scrubber, knit 5 more, scrubber...till the end.
Purl a row.
The pattern basically entails knitting one row, purling one row, knitting, purling, etc. On the knitted rows you alternate between knitting in five stitches before starting to make scrubbers and knitting in 1 stitch. There are always five knitted stitches between each scrubber. You should never be making scrubbers on a purled row.
Making a scrubber:
The scrubbers are places where yarn has been wrapped around three stitches and then the stitches are knitted, leaving sort of a bubble of yarn over the top.
This effect is created by transferring three stitches onto the double pointed needle. You don't need to knit them, just slide them over onto the double pointed needle.
Next wrap the yarn around the double pointed needle (and the three stitches) counter clockwise somewhere around five to seven times. Wrap the yarn so that it fits nice and snuggly, but don't try to strangle the stitches.
Now, knit the three stitches off of the double pointed needle one by one. Continue knitting five more stitches and repeat the process.
What you should have when you are done are nice rows of scrubbers alternating across your scouring pad.
Being cotton you can re-wash them over and over in the laundry whenever they begin to get ooky or smelly, and they store well in the drawer along with all the other dishcloths. Voila! Homemade scouring pads, without the plastic or the landfill!
Monday, September 28, 2009
Rainwater Usage: Dishwashing
at Monday, September 28, 2009It may sound a bit funny, but I'm stunted in the area of dish washing. The learning curve of having the dishes all washed, dried, and stacked neatly in our cabinets by the end of the night is one that has taken me quite a bit of time. More just always seem to appear, and then there is dinner and all its dishes, and just when I think all is completed I'll discover another glass in Jules' Man Room. It was enough to drive me completely insane. Along with this came much frustration from Jules that has a rather large issue with dishes and is convinced that every fly on earth must just know when there are dishes in our sink. Thankfully, with the expansion of our rain barrel water usage, the dishes have been converted into a very deliberate task during the day and have become much more manageable.
With the exclusion of about three months a year, we are one of the rainiest places in the continental United States. This leaves us with much water falling from the sky and quite a wonderful resource for harvesting to later return to the water table. With the rainy season returning (at least supposed to be returning) we are once again at a place to begin discussing the usage of our rain water. This last year, our toilet was flushed with rain water and with some treatment it can now be used for dish washing as well.
There is absolutely no treatment necessary for water if you are using it for irrigation, toilet flushing, or car washing. To use it inside as any kind of cleaning agent or use with human contact does require further considerations. The treating of rainwater really doesn't require much unless you are wanting to drink or cook with it. I don't think we will ever get to the point where our water is being used for direct consumption (however, I also never thought I would refill the back of my toilet after every flush as well). Two things need to be considered 1) the presence of bacteria or algae which could make you sick 2) heavy metals or pollution run-off from the rain collection sight. You can pay for an fancy (and expensive) water test, but ultimately don't need to if you know even a little bit about where you are collecting the water.
Living in an older house, both of these were concerns for us. The only portion of our roof which runs into our rain barrels is from our porch. The old fiberglass/asbestos sheeting which covered the porch has been swapped out for high impact plastic alleviating the worry of harmful chemical runoff from the sheeting. We have not replaced the gutter, however. This leaves some heavy metals as a possibility in our rainwater.
Secondly, the plastic we now use to cover our porch is clear and allows us to see the amount of accumulation of bird droppings, air pollution, or mold which might be growing. We get significant enough amounts of rain and the surface has a large enough slant, that it is fairly self cleaning.
The third consideration, is the area in which you live. We do not have a significant air pollution problem in our area. Sometimes in the summer there are air advisories, but mainly due to all the rain, it isn't an issue. If you are living places with acid rain, I would contact the local environmental studies/sciences department of your local university for advice.
Once you are sure of what might be contaminating your water, you can treat it accordingly. Water for dish washing needs to be treated much like potable (drinking) water because you are, after all, eating out of your dishes. But dishwater doesn't need to be taken to quite the measurable extreme as drinking water since poisoning yourself with the treatment chemicals isn't as much of a threat.
There are many different ways to disinfect water, but household bleach works for us. Make sure you are using plain bleach, no smells, or other foofy stuff. Straight bleach. Texas did quite a bit of research and came up with this list. Clorox is great for us. To sterilize water, you need 8 drops of bleach for each gallon. This means for a 55 gallon drum, you need to add 440 drops of bleach. Colorado State University recommends 1/2 teaspoon for every five gallons of water. Rather than count them all out, I compromised and just added 1/2 cup of bleach directly into the top of the barrel. This is more than 440 drops by quite a bit, but we are not drinking this water, just using it as a sterilized rinse to clean our dishes.
The bleachy water was left in the barrel for two days to thoroughly mix, combine, and have contact with any algae that might be stuck to the walls of the barrels. At this point, the water is all set to use for dish cleaning. When it comes out of the spigot, there is enough bleach that you can smell it (like a swimming pool) but not so much that it will take any color out of your clothes. One of our rain barrels is now filled with bleach water at all times and is used solely for dishwashing as the bleach would probably kill or severely damage any plants.
Warning: Do not drink water which has had bleach added, unless you are VERY careful about precision measurement. Any chemicals added to water without extreme precaution can make you very sick. We are NOT drinking this water, merely using it to clean with.
The dishwasher in our house is used as a holding tank for the dishes before I can get around to washing them by hand during the day. This way Jules doesn't ever have to see them and the flies which are lurking everywhere can't find them either. I do thirty minutes worth of dishes a day and then stop. This is normally enough to get the dishwasher completely empty, and results in me doing dishes usually only every other day because there aren't enough to justify using up the water.
 Doing the dishes now is fairly quick and painless, with the added perk of Jules approving over the level of cleanliness now presiding in the kitchen.The stopper is put in the sink, criss-crossed with dish soap and then I go out and fill one of the old Tidy Cats liter containers (which has been cleaned thirty million times!) we use to transport most all of our household rainwater. By dumping the water into the sink, the water gets all soapy and the dishes are done one by one starting with the cleanest and ending with the dirtiest. All the dishes then get an incredibly quick rinse in tap water due to a small concern over possible heavy metals from our gutters. They are then dried really well and put away.
The left over water in the sink is usually kinda gross. This water is used to soak any dishes which I will be washing the next day or any dishes that have stuck on food which needs to soak. The junk is all rinsed or soaked off of them and then they go back in the dishwasher to be formally cleaned the next day. It may seem like extra work, but they aren't scrubbed much and by taking the food bits off of them in the leftover water that is already disgusting, the dishwasher tomorrow won't get disgusting right away.
Once all the dishes have either been put away or placed back in the dishwasher, I rinse out the dishwasher with my washcloth and the extra sink water. By pre-rinsing the dishes, the water isn't anywhere near as bad as it used to be when I washed dishes and can be used really well to wash out the inside of the dishwasher so it doesn't get stinky. A stinky dishwasher might alert the flies as to where the dishes are being kept. We can't have that!
Blogroll
Template by:
